When running an appointment-based system on a WordPress website, you may want to ensure that only registered users can book appointments. This restriction helps prevent spam bookings, maintain user accountability, and improve overall management.
Easy Appointments is a powerful WordPress plugin that allows businesses to schedule appointments efficiently. However, by default, it does not restrict bookings to logged-in users.
This tutorial will guide you through setting up this restriction.
There are Two ways to allow only logged in user for booking.
- Normal option. ‘Allow public access to FullCalendar shortcode‘
- By Shortcode.
Normal Option. #
- Make sure the Easy Appointments plugin is always installed and updated to the latest version. If you’re unsure where to download it from, click on this link to get the latest ZIP file and install it on your site.

- Click on Appointments in the sidebar and go to the Settings.

- Click on ‘FullCalendar Shortcode’ and disable the ‘Allow public access to FullCalendar shortcode’ option.
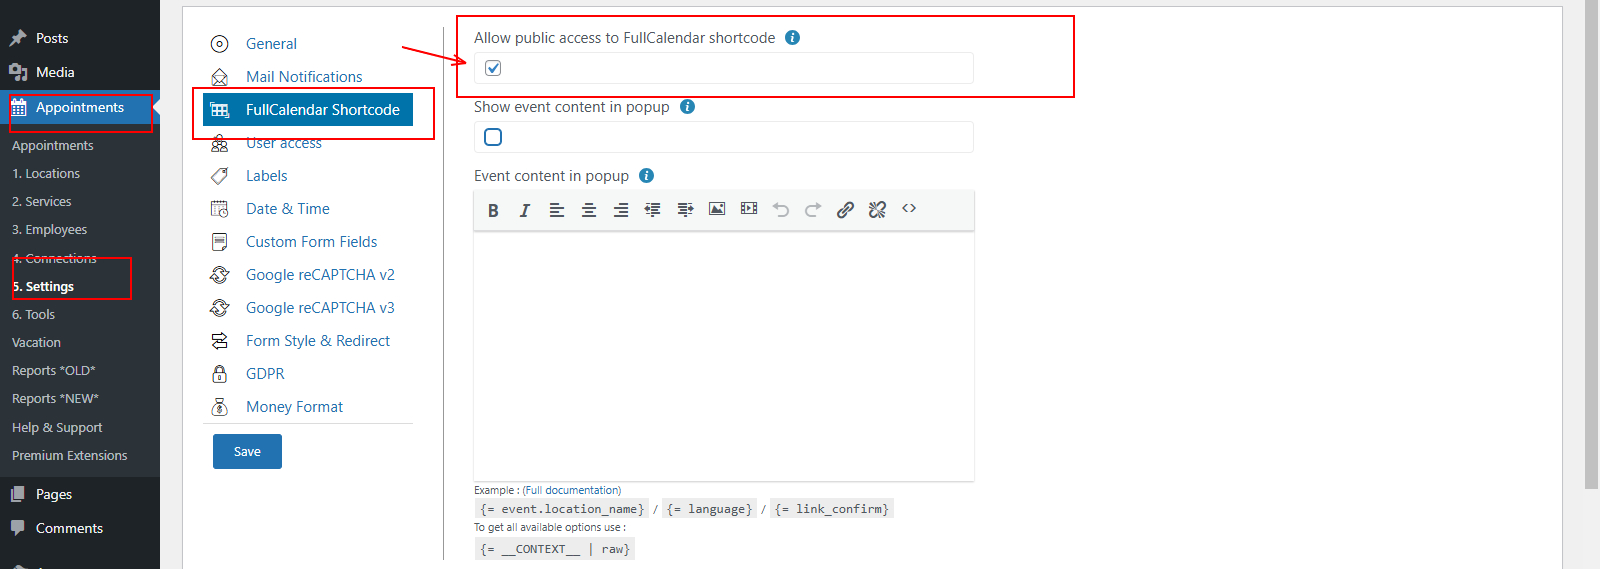
- Click on the ‘Save’ button and ensure that a pop-up appears to confirm it was saved correctly.

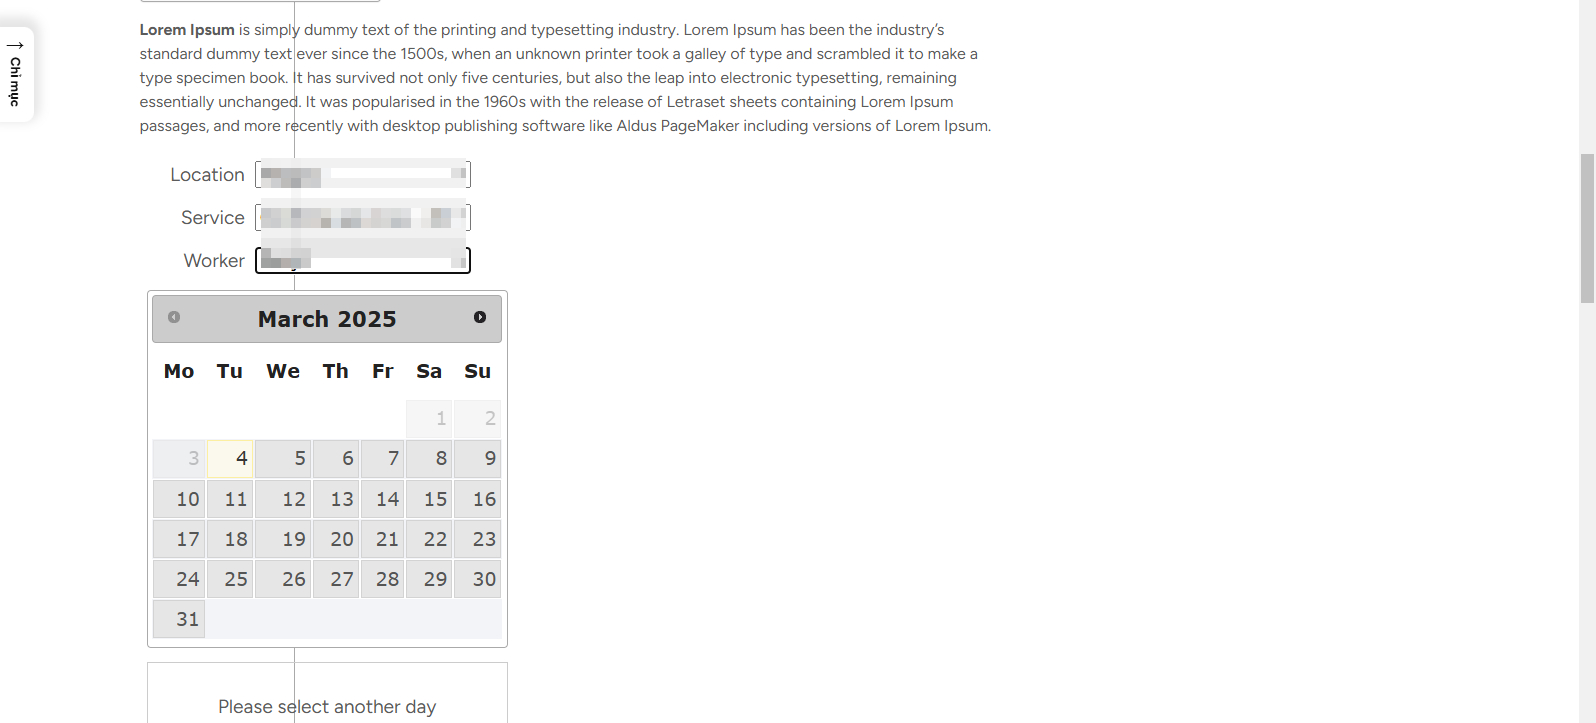
- You can see the two images below one showing a logged-in user and the other showing a guest user who is not logged in.
Logged in Browser
New Guest on Browser .

The booking calendar will not appear on the site if the user is not logged in.
Using Shortcode. #
In this method you can use blow shortcode on your Post / Page to allow only logged in user to make bookings.
[ea_full_calendar worker="logged"]

While using a shortcode, make sure to add it as shown in the image below. 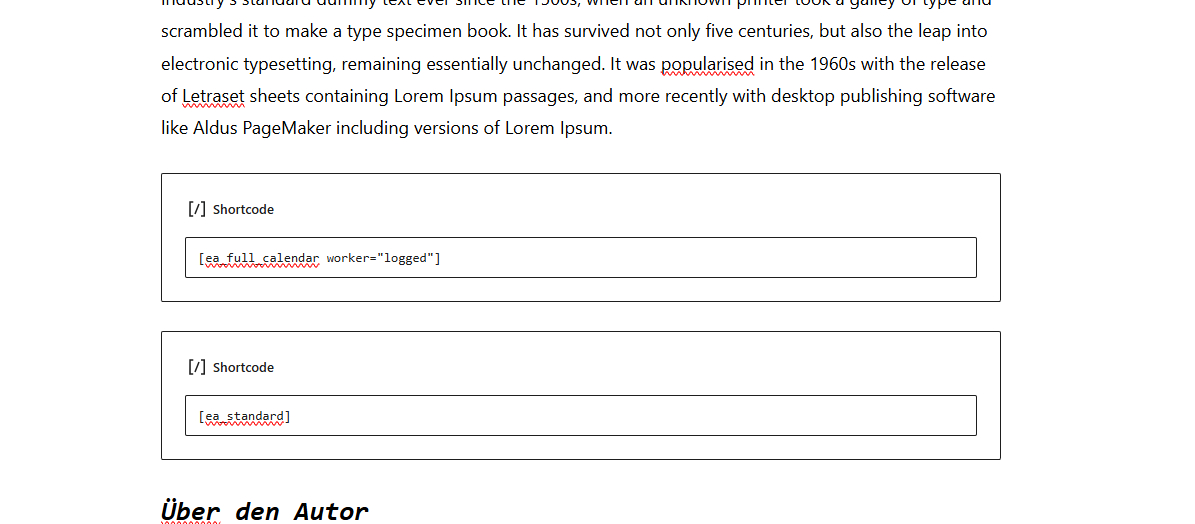
Then, the new user will be restricted from booking an appointment until they log in first.
Note: While using a shortcode, make sure the ‘Allow public access to FullCalendar shortcode‘ option, as described above, is always disabled.
That’s it for this tutorial..