Introduction #
WordPress relies on scheduled tasks for various background processes, such as:
- Publishing scheduled posts
- Sending automated emails
- Syncing with external services (e.g., Google Calendar)
- Processing WooCommerce orders
By default, WordPress uses WP-Cron, a built-in task scheduler. However, WP-Cron only runs when a visitor loads a page, which can lead to delays in executing important tasks if your site has low traffic.
A System Scheduler (Cron Job) is a more reliable alternative, ensuring tasks run at fixed intervals, even when there are no visitors. This guide explains what cron jobs and system schedulers are, why they are important, and how to set them up properly on your hosting server.
Understanding Key Terms #
What is a Cron Job? #
A Cron Job is a scheduled task that runs automatically at specified intervals on a server. It is commonly used for:
- Automating routine tasks (e.g., sending notifications, syncing data)
- Running background processes efficiently.
- Reducing the manual workload.
What is a System Scheduler? #
A System Scheduler is a server-side tool that executes cron jobs without relying on website visitors. Unlike WP-Cron, which only runs when someone visits your site, a system scheduler ensures that tasks run on time, improving site performance and reliability.
Why is import to connect with System Scheduler? #
First of all, the Extension plugin relies on background tasks for various processes. For example, syncing Google Calendar events or sending reminder SMS notifications requires scheduled execution. These tasks need a background process to run efficiently.
If your site is not connected to a system scheduler on your hosting, these tasks depend on visitors accessing your site. Each time someone visits, WordPress performs additional work to execute these tasks along with loading the content.
But what happens if there are no visitors for an entire hour and an SMS reminder needs to be sent? In that case, the SMS will be delayed until someone visits your site, triggering the task execution. This is the most important reason why you should connect your site to a System Scheduler.
Why Use a System Scheduler Instead of WP-Cron? #
| Feature | WP-Cron | System Scheduler |
|---|---|---|
| Reliability | Depends on site traffic | Runs at fixed intervals |
| Performance | Adds extra load on visitors | Runs independently in the background |
| Task Execution | Delayed if no visitors | Runs on schedule every time |
How to Connect WordPress with System Scheduler. #
Setting it up takes just a few minutes on your hosting. Depending on your hosting provider, you likely have a hosting management tool such as cPanel.
This guide will show you how to connect it using cPanel. The example provided is based on GoDaddy’s cPanel, but your cPanel interface may look slightly different due to variations in styles and themes.
Step #1 – Disable WP-Cron in wp-config.php #
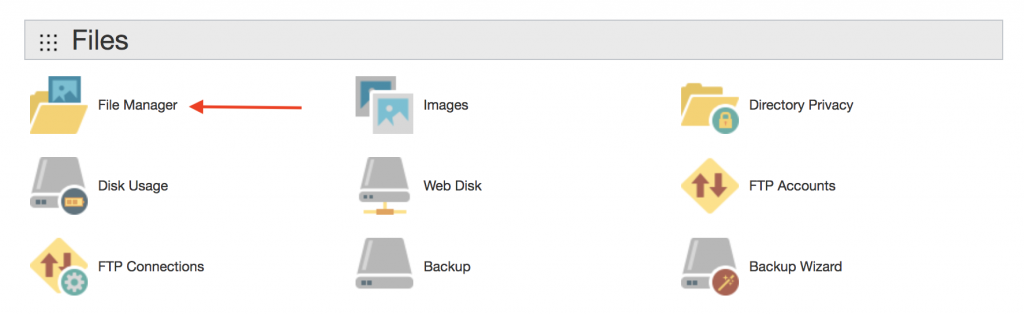
- Log in to cPanel.
- Open File Manager and navigate to your WordPress installation folder.
- Go to the
wp-config.phpfile.
- Click Edit and add the following line before the
/* That's all, stop editing! */comment:
define('DISABLE_WP_CRON', true);
👉 This prevents WordPress from running cron jobs on visitor page loads, allowing the system scheduler to take over.
Step #2 – Add a Cron Job in cPanel #
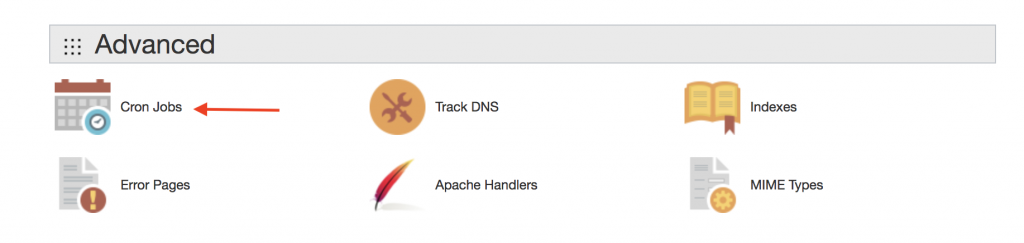
- In cPanel, find and open Cron Jobs.
- Add a new Cron Job with an interval of every 5 minutes.
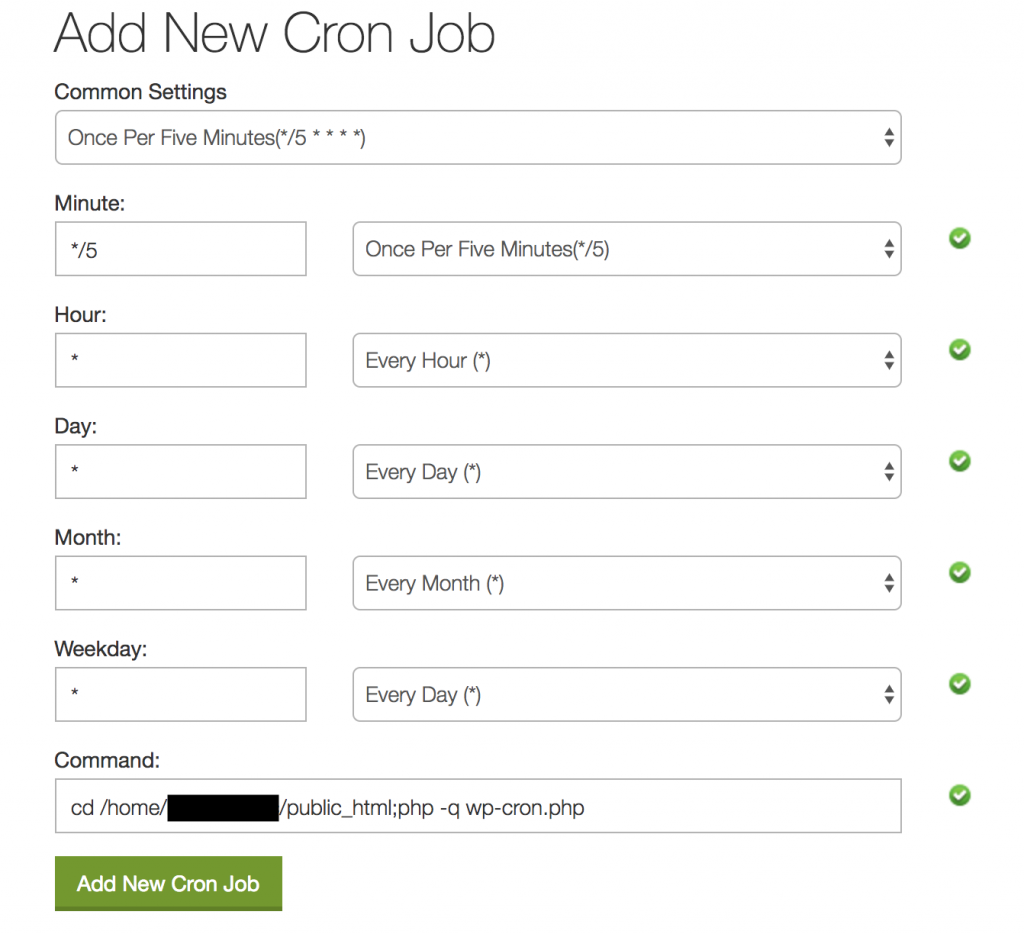
- Enter the following command (replace
<path_to_your_root_wp_folder>with the actual path to your WordPress root directory):

- Click Add Cron Job.
cd <path_to_your_root_wp_folder>; php -q wp-cron.php
- The command should now appear in the Cron Job list.
Step #3 – Verify That the Cron Job is Running #
- Open the Extension Plugin Settings page in WordPress.
- Look for error messages at the top of the page.
- If there’s an issue (e.g., “Cron Job not running”), double-check your cron job settings.
- If problems persist, contact your hosting support or post in the WordPress Support Forum or Contact us directly
💡 Note: Some hosting providers block cron jobs running at intervals shorter than 15 minutes. If this happens, set the interval to 15 minutes instead.
What to do in case that you don’t have Cron on your hosting? #
- Go to cron-job.org.
- Create an account and log in.
- Set up a new cron job to ping your WordPress site’s cron file every 5 minutes:
https://yourdomain.com/wp-cron.php
- Save and activate the cron job.
🔹 This ensures that scheduled tasks run automatically, even if your hosting provider does not support cron jobs.
Best Practices for Managing Cron Jobs #
✅ Use a System Scheduler Instead of WP-Cron
- Disabling WP-Cron reduces server load and prevents performance issues.
✅ Set the Right Interval
- Use a 5-minute interval for critical tasks. If your hosting limits this, set it to 15 minutes.
✅ Monitor Cron Job Execution
- Regularly check the WordPress logs or plugin notifications to ensure tasks are running correctly.
✅ Avoid Overloading the Server
- If your site has many scheduled tasks, space them out to avoid resource spikes.
✅ Use External Services If Needed
- If your hosting does not support cron jobs, use cron-job.org as an alternative.