
Before Easy Appointments Extension start with syncing the appointments with Google Calendar it is necessary to provide App data (cliend id and secret) and after it allow access to Calendar and retrieve the Access token.
Here is tutorial on how to set Google Client Id and Client Secret and obtain the Access token.
- Ensure that the Easy Appointments plugin is installed on your site and kept up to date with the latest release. If you’re not sure where to get it, use this link to download the most recent ZIP file and install it on your website.

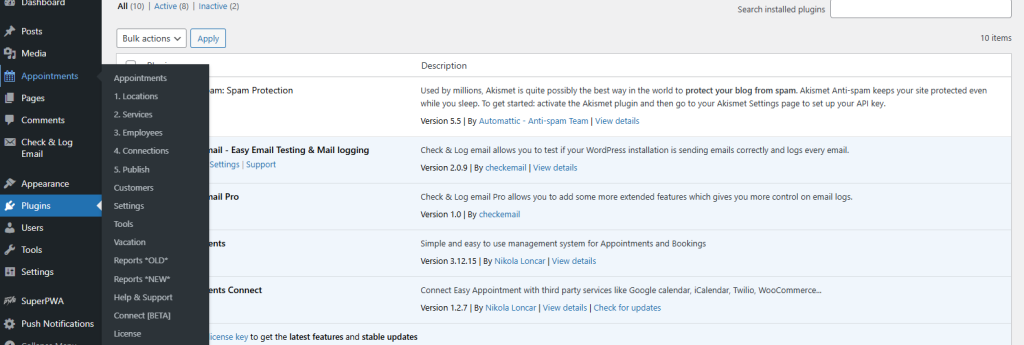
- Click on Easy Appointments and select the ‘Connect Beta’ option. You will be redirected to the Outlook setup page.
- The Dashboard will look like this. Click on Google calendar.

- Go to Google Cloud console and Click on ‘My First Project’.

- Click on APIs & Services and enable the required services.

- Search for “Google Calendar” and select the first result.

- Click on the “Google Calendar API option and enabled this. After this dashboard will appear.

- First, complete the credentials consent process, and then click on “Create OAuth Client.”

- Once you click on “Create OAuth Client,” you’ll be redirected to a page where you need to fill in all the required details. Enter the “Authorized JavaScript origins” and “Authorized redirect URIs”, you can find these details on your WordPress dashboard.


- You will get this information once you click on create.

- Click on OAuth 2.0 Client IDs, and you’ll find the Client ID and Client Secret, which are essential for the setup.


This way, you can obtain the essential information required for Google Calendar integration. For a better understanding, you can also refer to the video below.
That’s it for this tutorial — if you need any further assistance or have any concerns, feel free to reach out to us directly.